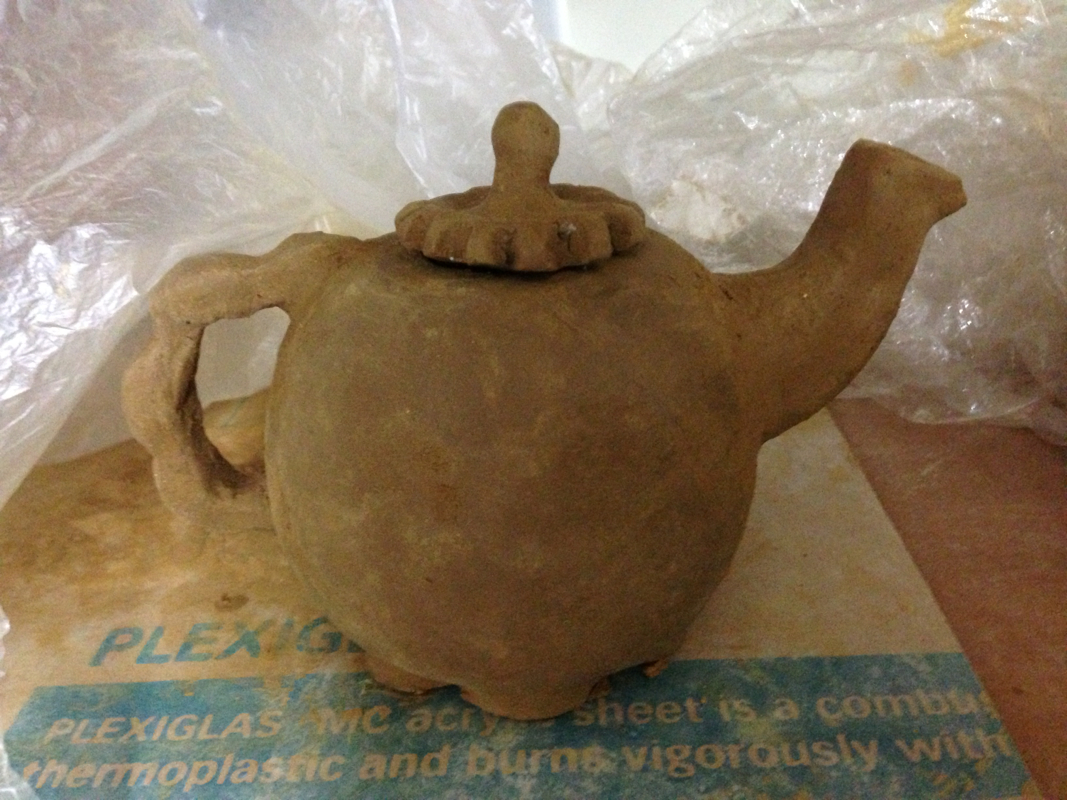
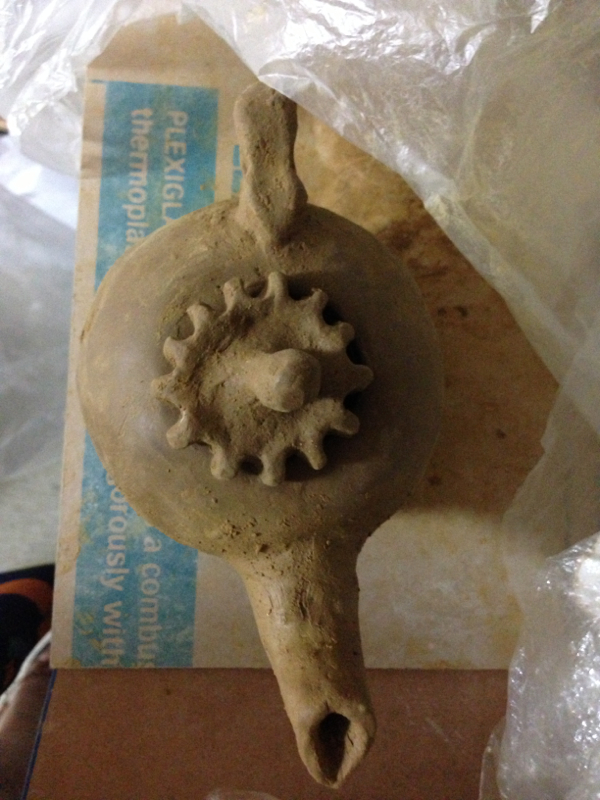
So the teapot is finally finished. the handle, spout ( finally, after 2.5 classes of struggling) and the lid is added as well. I wanted a asian peaceful looking pot initially.. the one that's white with green bamboos and have the beauty of being simple, but apparently it's harder than it looks. You need to have a perfect pot to do that, and a wheel, which helps the perfection aspect of it. Well, my pot ended up looking kinda fun and funky, which I like now. I have to glaze it now, and i want it spunky and cute like it's shape. So far, all of my pots look pretty nice and I'm satisfied with all of them. I'm especially proud about the flower foot for this one. It was harder than it looks.
|
So I continued "this Week" to work on my potion vial. I worked on smoothening my sides more and flattening them out. I carried the edges even more to the neck of the pot, giving it more of a "vial" look. My pot also started to dry ( from bottom to up) and it made the pot more stable. I was able to work and touch my pot without worrying about deforming it's shape or breaking it. I was also happy to see that the pot didn't crack while drying and shrinking. 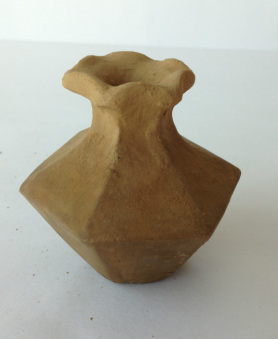 The biggest concern this week for me was the mouth. If you look at the 1st blog post that I made, you will notice that my pot has a round smooth mouth instead of a wiggly one that I have in this picture. The mouth that I ended up with was actually a result of a long process of trial and error. I originally tried to make a smooth mouth that slightly curved outwards. However, no matter how hard I tried, it seemed impossible to make the pot work! When I spent an hour to make the mouth somewhat even, I noticed that the thickness of the sides of the mouth weren't, and vise versa. At one point I got so frustrated that I gave up on making my pot's mouth and squished the sides in to make a star. The star design looked pretty nice, so I followed by pot's sides and made a 6 edged star/flower shaped mouth. I really like how it turned out. 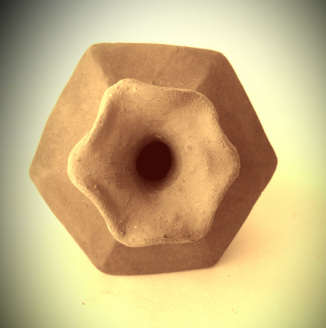 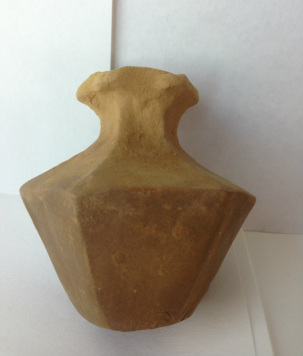 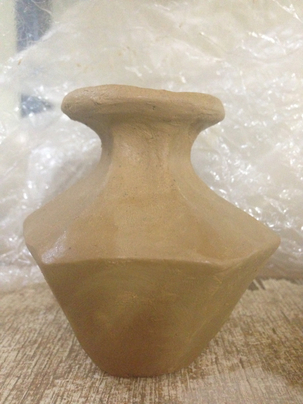 " This Week ", I made my very first pot. I have done some clay work before, but I've never done an actual ceramics clay class so this whole experience was new to me. This was originally supposed to be a practice pot, but I ended up liking it a lot so I am thinking about using it for my 6 pots. The pot that I originally had in mind was more of a vase shaped pot. I liked how elegant a vase looked with a long neck and a fat vase, and I was hoping I could glaze it white so I could keep it simple and clean. My pot started out like a cup, which then I extended the mouth, squeezing the clay to make a neck and a small opening. I liked how the form looked, but it seemed like I couldn't get the sides to even out no matter how hard I tried. After getting a tip from Alisa that I should use a rib to tap the pot and smooth out the wrinkles (?) on the surface, I worked my way around the pot and started to tap on the pot. While doing so however, I accidentally pressed too hard on one of the sides creating a giant dent on my fairly round pot. I freaked out at first thinking that I needed to spend the rest of class smoothening the pot, but after looking at it again, the dent made the pot seem more... fun. I worked around the pot dividing the pot to 6 sections and flattening each one. I really like how it looked :) Alisa said it looked like a potion bottle from games and stuff.
|
